How to Setup Kubeflow on AWS Using Terraform
- Yono Mittlefehldt
- 9 min read
- 3 years ago
Welcome back! In our last post, we saw how to install Kubeflow locally for experimentation and learning purposes. Now you’re pretty sure you want to use it in production. How do you go about doing that?
In most cases, this means setting up Kubeflow on a cloud platform, like AWS or GCP. That’s exactly what this post will help you do!
The major steps to setting up Kubeflow on AWS are:
- Spin up an AWS Instance
- Install tools
- Install Python 3.8
- Clone Kubeflow Git repositories
- Configure AWS credentials
- Update Terraform config files
- Use Terraform to deploy Kubeflow
- Setup Kubeflow Dashboard
That looks like a lot, but we’ll walk you through each step, simplifying the process. We made all the mistakes, so you don’t have to!
What are you waiting for? Let’s get started!
What Kind of AWS Instance Should I Use?
When you boil it down, AWS is a complicated beast. There are several ways to launch an AWS instance and sometimes different regions support different methods. If you need help getting started here, please consult AWS’s documentation on launching an instance.
The one thing you should know is that you don’t need a machine with a beefy GPU. For this tutorial, I used an m5.xlargeclass machine running Ubuntu 22.04. You may, however be able to get away with a smaller machine type.
The rest of this tutorial assumes you’ve SSH’d into your AWS instance and are running the commands from there, unless otherwise specified.
Which Tools Do I Need?
In order to handle the setup process, we need to install a few standard tools, like git, curl, unzip, etc…
First, we’re going to ensure our repositories and currently installed packages are up-to-date:
sudo apt update
sudo apt upgrade
Then we install (most of) the tools we need using:
sudo apt install git curl unzip tar make vim wget -y
How Do I Install Python 3.8?
AWS’s flavor of Kubeflow requires Python 3.8! 🤦 What is this, 2019?
Well, to do that, you need to first add the deadsnakes APT repository. Get it? Dead snakes? Anyway, you can do that with:
sudo add-apt-repository ppa:deadsnakes/ppa -y
sudo apt update
Then you can install Python 3.8 and the distutils package with this command:
sudo apt install python3.8 python3.8-distutils -y
Finally, to ensure that the AWS Kubeflow scripts work, we need to ensure this version of Python is the one used by default. To do this, we’ll alias the command:
alias python=python3.8
Which Kubleflow Repositories Do I Need to Clone?
You’re going to need to clone two Git repositories:
- AWS’s special Kubeflow manifests repo, and
- the standard Kubeflow manifests repo
First setup some environment variables:
export KUBEFLOW_RELEASE_VERSION=v1.7.0
export AWS_RELEASE_VERSION=v1.7.0-aws-b1.0.0
Next clone AWS’s Kubeflow manifests repository and checkout the appropriate release version:
git clone <https://github.com/awslabs/kubeflow-manifests.git>
cd kubeflow-manifests
git checkout ${AWS_RELEASE_VERSION}
Then clone the standard Kubeflow manifests repo under the AWS one you just cloned:
git clone --branch ${KUBEFLOW_RELEASE_VERSION} <https://github.com/kubeflow/manifests.git> upstream
Finally, you’re going to use the Makefile in the repo to install a bunch of the tools you’ll need to setup Kubeflow, including kubectl, kustomize, and terraform:
make install-tools
How Do I Configure AWS Credentials?
With all of the dependency stuff out of the way, it’s time to configure your AWS credentials.
First, you’ll use the aws CLI to configure your credentials under a profile called kubeflow. You can name the profile whatever you want… but being descriptive is helpful!
aws configure --profile=kubeflow
This will ask you for four pieces of information:
- AWS Access Key ID
- AWS Secret Access Key
- Default region name
- Default output format
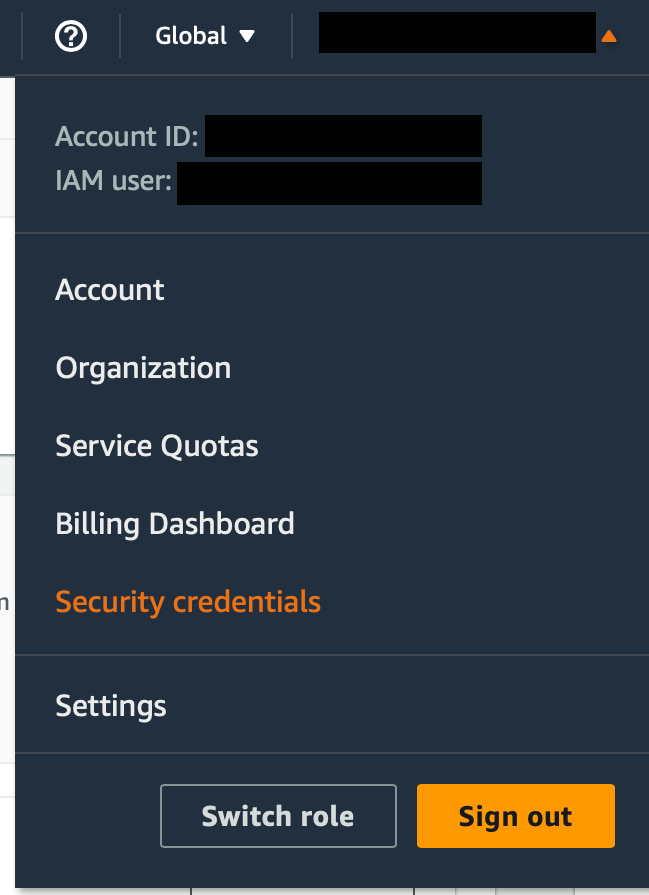
The first two can be created from your AWS console. If you click your username in the top right corner, and then select Security Credentials, you will be able to create these two keys.
For the Default region name, use the same region you want to spin up Kubernetes nodes in. This is probably the same region you spun up your instances in.
Set Default output format to json.
Next we’re going to set some environment variables to make things easier:
export AWS_PROFILE=kubeflow
export CLUSTER_NAME=awesome-kubeflow
export CLUSTER_REGION=...
Make sure you set AWS_PROFILE to the same name you created with the previous command.
You can set CLUSTER_NAME to anything you want AS LONG AS it’s not longer than 19 characters.
Finally, make sure your CLUSTER_REGION matches what you’ve set before.
What Changes Do I Need to Terraform Config Files?
We need to make some slight updates to two default Terraform configuration files.
First change to the right directory:
cd deployments/vanilla/terraform
Then, using your favorite editor (like vim) to edit variables.tf. What you want to do is find the definitions for the default node_instance_type and node_instance_type_gpu. Set them to what you need for your project.
variable "node_instance_type" {
  description = "The instance type of an EKS node"
  type        = string
  default     = "m5.xlarge"
}

variable "node_instance_type_gpu" {
  description = "The instance type of a gpu EKS node. Will result in the creation of a separate gpu node group when not null"
  type        = string
  default     = "g4dn.xlarge"
}
In the example above, we’ve left m5.xlarge as the default node_instance_type, but changed the default node_instance_type_gpu from None to g4dn.xlarge. If you leave it at None, your cluster will not support running jobs that require GPUs.
Next, edit main.tf to set the values for min_size, desired_size and max_size under managed_node_group_cpu and managed_node_group_gpu. If you’re happy with the defaults, then you don’t need to change anything.
Here’s an example we used:
managed_node_group_cpu = {
    node_group_name = "managed-ondemand-cpu"
    instance_types  = [var.node_instance_type]
    min_size        = 2
    desired_size    = 2
    max_size        = 5
    subnet_ids      = module.vpc.private_subnets
  }

  managed_node_group_gpu = local.using_gpu ? {
    node_group_name = "managed-ondemand-gpu"
    instance_types  = [var.node_instance_type_gpu]
    min_size        = 1
    desired_size    = 1
    max_size        = 3
    ami_type        = "AL2_x86_64_GPU"
    subnet_ids      = module.vpc.private_subnets
  } : null
Finally, we need to create a new config file with the following command:
cat <<EOF > sample.auto.tfvars
cluster_name="${CLUSTER_NAME}"
cluster_region="${CLUSTER_REGION}"
EOF
This defines the values for the cluster_name and cluster_region variables used by main.tf and variables.tf.
How Do I Deploy Kubeflow Using Terraform?
Now we’re ready to deploy Kubeflow using Terraform. First we want to initialize a working directory containing Terraform configuration files:
terraform init
This is the first command that should be run after writing a new Terraform configuration and is safe to run multiple times.
Next we run:
terraform plan
This creates an execution plan, which lets you preview the changes that Terraform plans to make to your infrastructure.
Finally, we deploy using the repo’s Makefile:
make deploy
This will take a good bit of time. So now is the perfect time to grab a cup of coffee or tea.
☕
How to Setup Kubeflow Dashboard?
Provided there were no errors when deploying, you’re ready to setup access to the Kubeflow Dashboard.
The first thing we need to do is run:
$(terraform output -raw configure_kubectl)
This command updates the kubeconfig.
Next, we need to change back to the root of the repository:
cd ../../../
Then we can use the Makefile to forward the appropriate port to the ingress gateway:
make port-forward
Finally, we need to use SSH tunneling from our local machine to the Kubernetes cluster on AWS:
ssh -i <path-to-your-key-pem> -L 8080:localhost:8080 -N ubuntu@<Public-IPv4-DNS> -o ExitOnForwardFailure=yes
Once you do this, you can open http://localhost:8080 in your favorite browser:
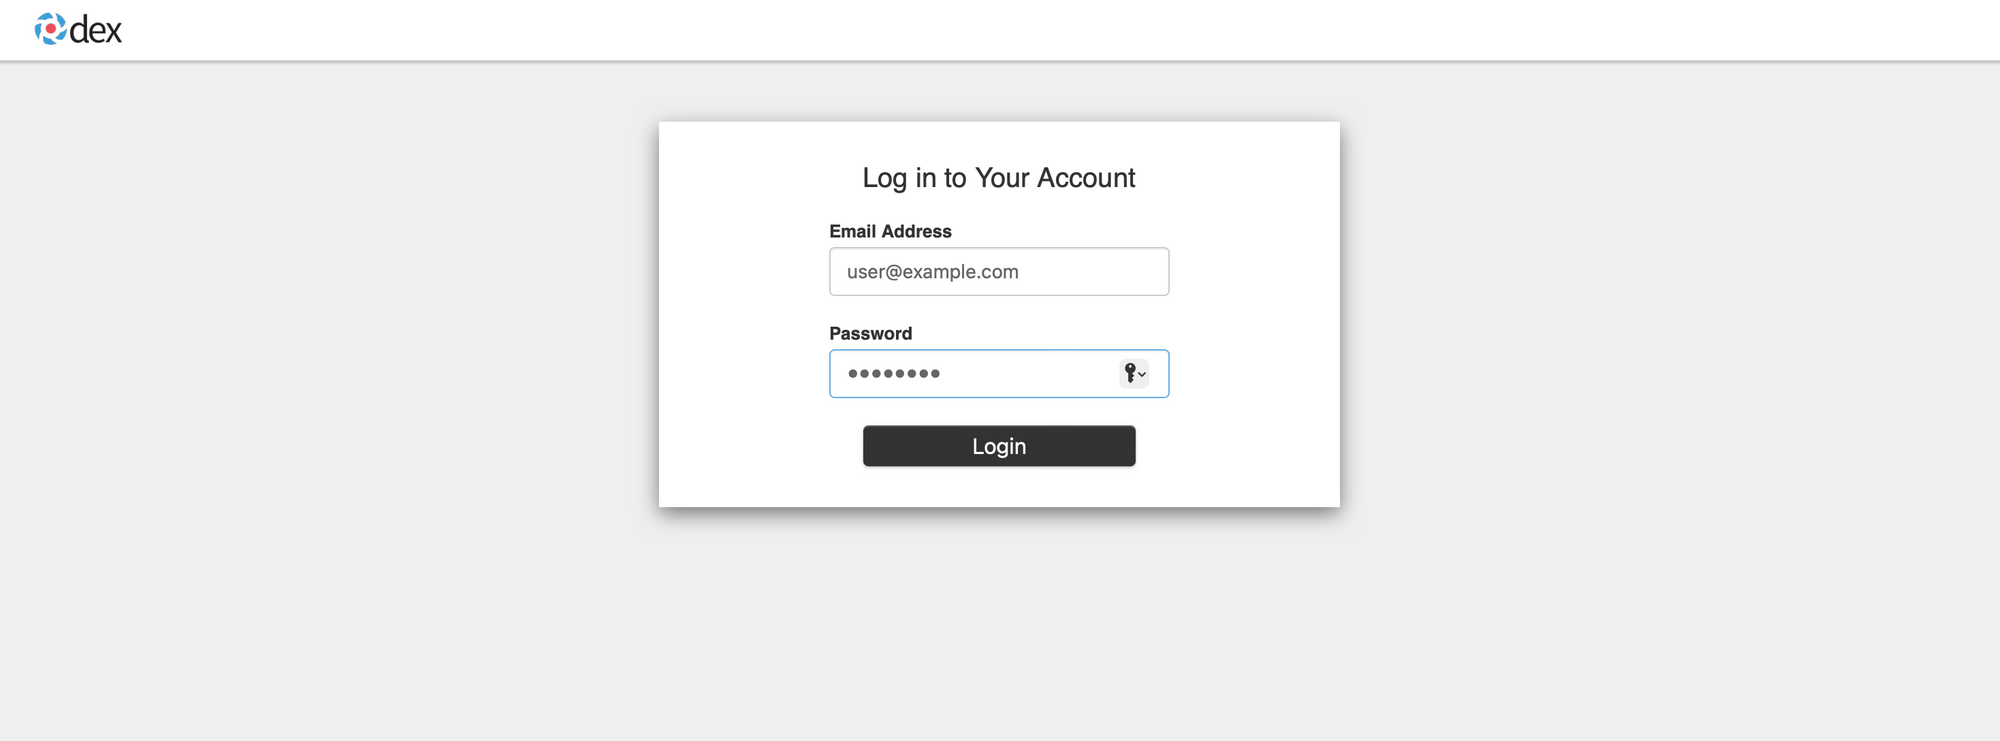
The default username is user@example.com and the password is 12341234. Once you log in, you will be greeted by the Kubeflow dashboard

From here you can check out Kubeflow’s components documentation to learn more about the dashboard and how to get started with it.
How do I stop everything?
When you’re ready to stop everything, navigate back to the deployments/vanilla/terraform folder and run:
make delete
Troubleshooting
Because both AWS and Kubernetes are both extremely complex systems, sometimes things might go wrong. Here are some of the issues I ran into while spinning up a Kubeflow cluster.
Wrong region
When running terraform init && terraform plan you see:
╷
│ Error: configuring Terraform AWS Provider: validating provider credentials: retrieving caller identity from STS: operation error STS: GetCallerIdentity, https response error StatusCode: 0, RequestID: , request send failed, Post "<https://sts.us-east-2a.amazonaws.com/>": dial tcp: lookup sts.us-east-2a.amazonaws.com on 127.0.0.53:53: no such host
│
│   with provider["registry.terraform.io/hashicorp/aws"],
│   on main.tf line 54, in provider "aws":
│   54: provider "aws" {
│
╵
You likely have the wrong region when setting up the Terraform config files. This can be fixed by editing the sample.auto.tfvars file.
Make sure the region doesn’t end in a letter. I.e. even if your machine says it’s in us-east-2a, use us-east-2 as your region for all configuration files.
Bad cluster name
If you get the following error:
╷
│ Error: Invalid value for variable
│
│   on variables.tf line 2:
│    2: variable "cluster_name" {
│     ├────────────────
│     │ var.cluster_name is "kubeflow-minimagen-3"
│
│ The cluster name must be between [1, 19] characters
│
│ This was checked by the validation rule at variables.tf:6,3-13.
╵
It means the cluster name you chose was too long. It cannot be longer than 19 characters.
Quota limits
If, while deploying, you get:
╷
│ Error: waiting for EKS Node Group (kubeflow-minimagen3:managed-ondemand-gpu-2023050809570864240000000d) to create: unexpected state 'CREATE_FAILED', wanted target 'ACTIVE'. last error: 1 error occurred:
│       * eks-managed-ondemand-gpu-2023050809570864240000000d-f4c3fd65-8fe7-40f7-ce85-85088124e3eb: AsgInstanceLaunchFailures: Could not launch On-Demand Instances. VcpuLimitExceeded - You have requested more vCPU capacity than your current vCPU limit of 0 allows for the instance bucket that the specified instance type belongs to. Please visit <http://aws.amazon.com/contact-us/ec2-request> to request an adjustment to this limit. Launching EC2 instance failed.
│
│
│
│   with module.eks_blueprints.module.aws_eks_managed_node_groups["mg_gpu"].aws_eks_node_group.managed_ng,
│   on .terraform/modules/eks_blueprints/modules/aws-eks-managed-node-groups/main.tf line 1, in resource "aws_eks_node_group" "managed_ng":
│    1: resource "aws_eks_node_group" "managed_ng" {
│
╵
This means you have exceeded your quota limit for a particular machine type. In this case, it’s the GPU-based machines. Since we requested g4dn.xlarge, we need to request a quota increase for Running On-Demand G and VT instances.
It’s very important that you increase your quota for On-Demand instances and NOT Spot instances or Dedicated hosts.
???
If you get this mysterious error:
╷
│ Error: timed out waiting for the condition
│
│   with module.eks_blueprints_kubernetes_addons.module.aws_fsx_csi_driver[0].module.helm_addon.helm_release.addon[0],
│   on .terraform/modules/eks_blueprints_kubernetes_addons/modules/kubernetes-addons/helm-addon/main.tf line 1, in resource "helm_release" "addon":
│    1: resource "helm_release" "addon" {
│
╵
This seems like an intermittent error. Try changing regions.
Congratulations! You’ve now setup Kubeflow on AWS! To do so, you’ve installed and learned:
- a little bit about Kubeflow,
- a bit more about Terraform,
- and a lot about AWS
This is a huge achievement and a great start to learning more about Kubeflow (and potentially Kubernetes in general).
In our next post on Kubeflow, we’ll show you how to train a text-to-image model on about 87 GB of data using Kubeflow. Sounds like fun, right?
If you have any questions, feel free to reach out. You can join our Discord, where we’ve built a vibrant, helpful and friendly community.


