Reverse Engineering Google Colab
- Arjun Vikram
- 9 min read
- 4 years ago
Open Source Data Scientist @ DagsHub

Google Colaboratory, better known as "Colab" by data scientists around the world, is a free cloud Jupyter notebook platform. In addition to providing an environment for users to run Python and R notebooks, Colab generously allows users to share free access to a limited number of GPUs and TPUs.
Colab has quickly become the defacto environment among data scientists for coding inside Jupyter notebooks. However, it's incredibly difficult to harness the compute power of Colab for anything beyond Jupyter notebooks. For Machine Learning engineers that want to productionize their models and bring them out of the notebook stage, this is a particularly relevant issue; notebooks, while perfect for exploration, don't play well with more advanced MLOps tools that codify the training process into a formal pipeline.
I was in this position a few days ago, and I decided that instead of morphing my workflow around the restrictions of Colab, I would try to morph Colab around my workflow!
For that reason, today we will take a peek into the internals of Google Colab, and discover how we can bend the rules of Colab a little. To be clear, nothing we do here will cause any harm to Colab or to users of the service, we’re only exploring behind the scenes.
Behind the Curtain
Colab’s secret sauce lies in its backend: the Google servers providing the infrastructure to let you run your code with a snap of your fingers and the press of a button. Thus, our first step is to analyze that backend API. The easiest way to do this is to inspect the API calls made by Colab during its normal operation. To do so, we launch Chrome’s Developer Tools and find the Network tab, then try to run a cell of code. DevTools starts recording every request made by Colab, and almost immediately we find something interesting.

It looks like this URL (/tun/m/<id>/socket.io) is a proxy to the Jupyter socket running on the remote machine.
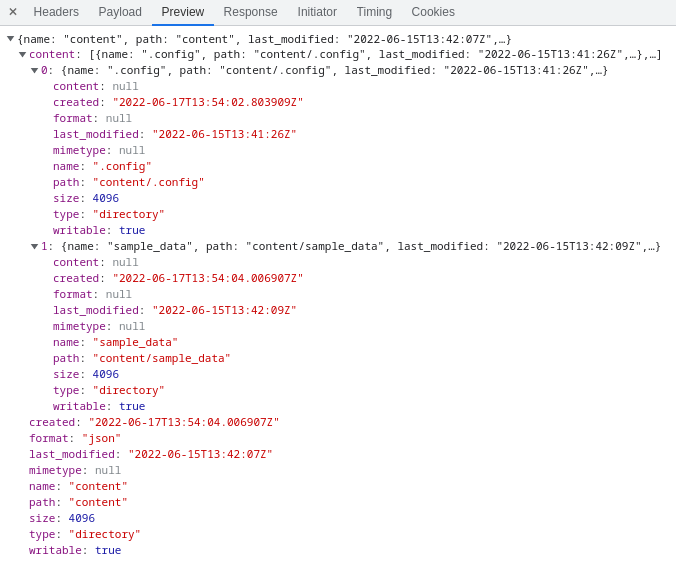
If we launch the Files pane (which shows the /content directory by default) from the left pane of the Colab UI, we get another interesting request:

This time, the response body is JSON enumerating the files on the remote host. It appears that the URL (/tun/m/<id>/api/contents/) points to a service that provides file metadata.
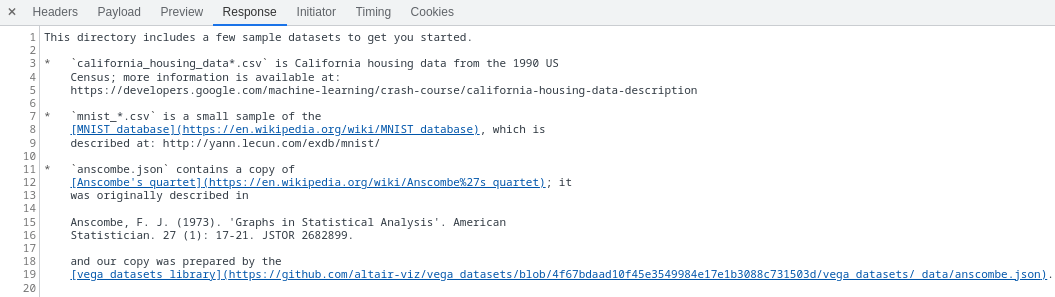
Double-clicking on a file in the Files pane causes Colab to download and display it. If we try to click on /content/sample_data/README.md, we notice a request to /tun/m/<id>/files/ that returns the contents of that file.

It's clear that https://colab.research.google.com/tun/m/<id>/ is a reverse proxy to the server running our Colab instance, which provides the /socket.io, /files, and /api/contents endpoints.
Let's try to see if any of these services are running inside the Colab container instance itself. The lsof program is installed inside Colab, so we run lsof -iTCP -sTCP:LISTEN to list all processes that are listening on a TCP port for network requests.

Aha! colab-fileshim, node, and jupyter-notebook all look like promising surfaces to explore. Since we've played with the Files pane already, let’s look at colab-fileshim first. It has PID 28, so we check the /proc filesystem to look at the full command line of the process:
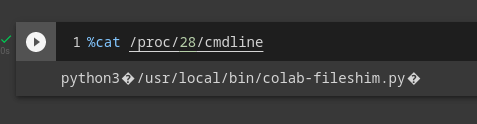
The next step is to investigate /usr/local/bin/colab-fileshim.py. Ironically, we can do this by browsing to it in the Files pane itself. The program seems mostly like an uninteresting fileserver, and we don't learn much from it other than that the server itself responds to localhost:3453/files (with actual file contents) and localhost:3453/api/contents (with JSON metadata). This means that Colab forwards those requests from the tunnel URL to port 3453 on the instance itself.
From the Network tab of the Chrome DevTools, we can right click a request to copy the cURL command to reproduce it. For instance, here is the cURL command for viewing the README.md file:
$ curl 'https://colab.research.google.com/tun/m/m-s-3oy94z70yrj59/files/content/sample_data/README.md?authuser=0' \
  -H 'authority: colab.research.google.com' \
  -H 'x-colab-tunnel: Google' \
  -H 'accept: */*' \
  -H 'dnt: 1' \
  -H 'accept-language: en-US,en;q=0.9' \
  -H 'sec-fetch-site: same-origin' \
  -H 'sec-fetch-mode: cors' \
  -H 'sec-fetch-dest: empty' \
  -H 'referer: https://colab.research.google.com/' \
  -H 'cookie: <<READACTED>>' \
  -H 'range: bytes=0-930' \
  --compressed
If we run this command on our local computer’s terminal, we get the contents of that README file printed to our terminal. With a little bit of trial and error, we see that we can trim down most of those headers, leaving behind only
$ curl 'https://colab.research.google.com/tun/m/m-s-3oy94z70yrj59/files/content/sample_data/README.md?authuser=0' \
  -H 'x-colab-tunnel: Google' \
  -H 'cookie: <<READACTED>>'
The x-colab-tunnel header is there to prevent us (or evil attackers) from making these requests from regular browser tabs, ostensibly to stop XSS attacks. The cookie header provides authentication to Google to prove we have access to the notebook instance. Because the cookie is long and unwieldy to work with, we will store it into the shell variable $COLAB_COOKIE for the remainder of this article.
$ COLAB_COOKIE="<<PREVIOUSLY REDACTED VALUE>>"
# Usage: $ curl ... -H "cookie: $COLAB_COOKIE"
Victory 1: Expose our own servers
Now that we have discovered Colab’s reverse proxy, let’s see if we can use it to tunnel our own requests!
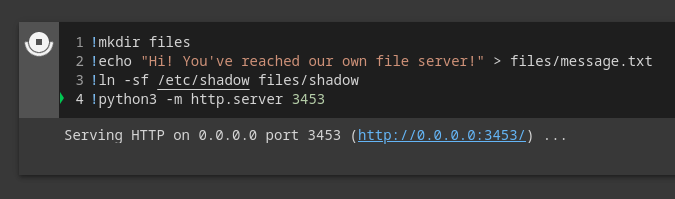
Instead of trying to mess with the existing colab-fileshim.py server, we could simply replace the process with a server of our own! We run pkill -f colab-fileshim to kill it, so we can then start our own server on the same port.
For a short and simple demo, we will launch python’s default HTTP server to serve our own files at localhost:3453/files.
Voila! We can now change the cURL command to download our own files!
$ curl 'https://colab.research.google.com/tun/m/m-s-3oy94z70yrj59/files/message.txt?authuser=0' \
  -H "x-colab-tunnel: Google" -H "cookie: $COLAB_COOKIE"
Hi! You've reached our own file server!
$ curl 'https://colab.research.google.com/tun/m/m-s-3oy94z70yrj59/files/shadow?authuser=0' \
  -H "x-colab-tunnel: Google" -H "cookie: $COLAB_COOKIE"
root:*:18585:0:99999:7:::
daemon:*:18585:0:99999:7:::
bin:*:18585:0:99999:7:::
sys:*:18585:0:99999:7:::
sync:*:18585:0:99999:7:::
# ...
Notice the log line in the Colab cell proving that our server handled the request:
Serving HTTP on 0.0.0.0 port 3453 (http://0.0.0.0:3453/) ...
172.28.0.1 - - [22/Jun/2022 16:43:10] "GET /files/message.txt HTTP/1.1" 200 -
172.28.0.1 - - [22/Jun/2022 16:43:16] "GET /files/shadow HTTP/1.1" 200 -
Sadly, because of the required x-colab-tunnel: Google header, we can't easily access the server from the browser.
Further Reconnaissance
Let’s continue investigating, this time by taking a look at the other interesting process we identified earlier, node. If we check /proc/7/cmdline, we see that the process is running /datalab/web/app.js.
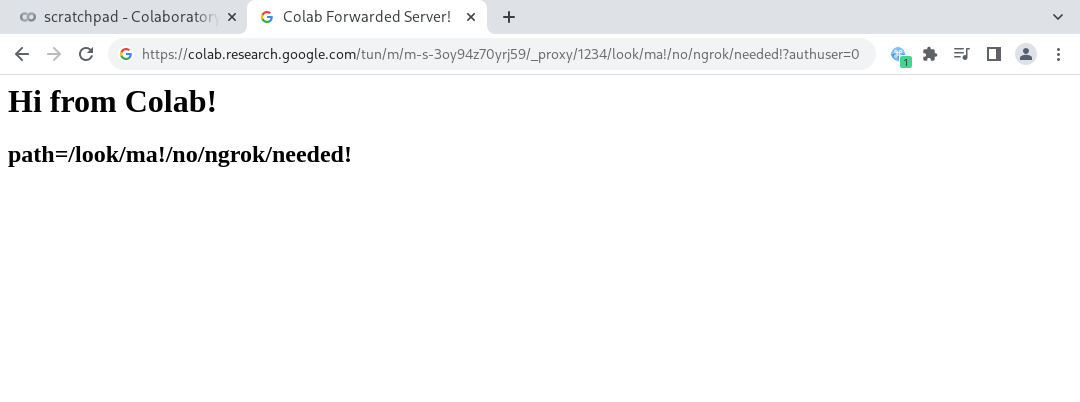
Once we jump there and read that code, we find that /datalab/web contains a fairly standard NodeJS application. Along with the previously seen /socketio/ route, it also exposes a /_proxy/{port}/ route. Aha! This should let us access any URL from any port on the Colab instance!
Let’s launch a quick server and test.
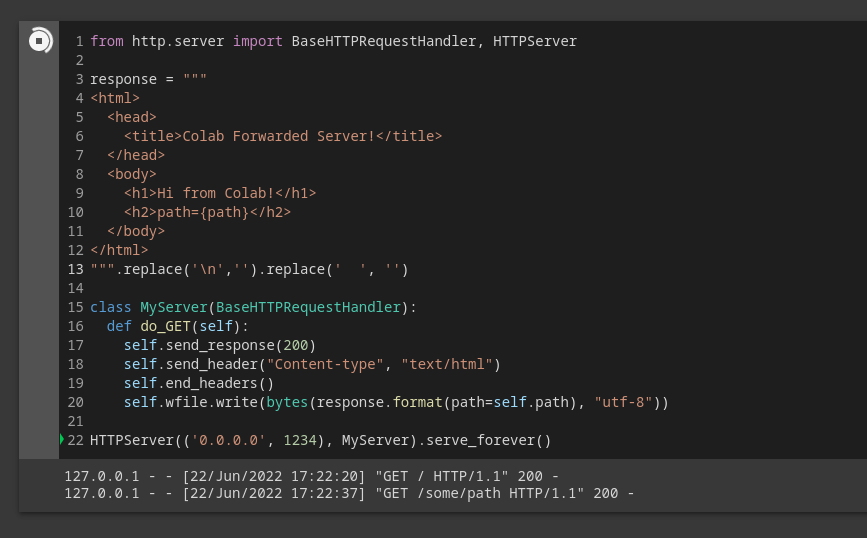
$ curl 'https://colab.research.google.com/tun/m/m-s-3oy94z70yrj59/_proxy/1234/some/path?authuser=0' \
  -H "x-colab-tunnel: Google" -H "cookie: $COLAB_COOKIE"
<html><head><title>Colab Forwarded Server!</title></head><body><h1>Hi from Colab!</h1><h2>path=/some/path</h2></body></html>%
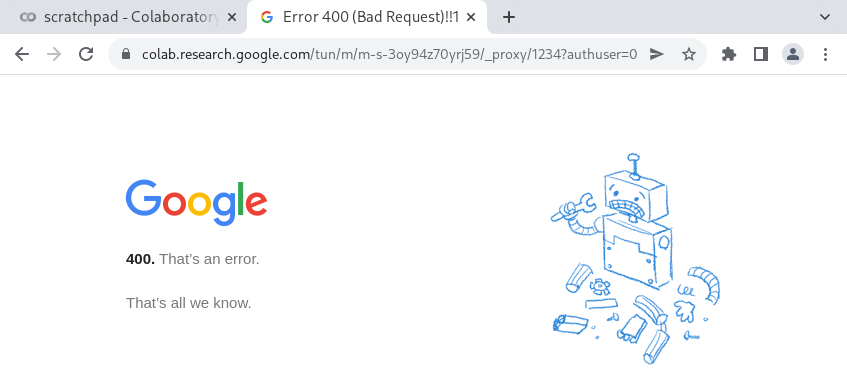
If only we could view this HTML page from a browser tab. Unfortunately, Colab refuses to proxy any requests unless they have the x-colab-tunnel: Google header set. If we attempt to visit these URLs from the browser, we are met with a generic HTTP 400 Client Error page:
Victory 2: Expose entire webpages
Fortunately, we can use a Chrome Extension to insert HTTP headers into browser requests on-the-fly. We set it up to send the x-colab-tunnel: Google header on all requests:
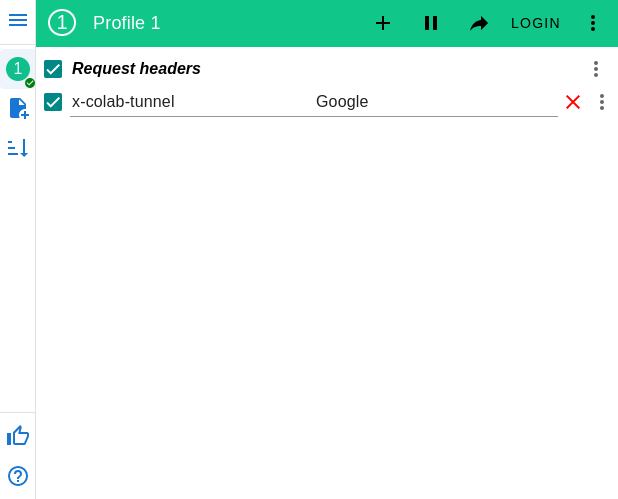
We can then launch the tunneled URLs in our browser!
To The Moon Planet Jupyter!
Finally, let’s take a look at the third and final interesting process from above, jupyter-notebook, which listens on port 9000.
We can first try to visit the port from the browser using our proxy and header trick from earlier by visiting /tun/m/<id>/_proxy/9000. Sadly, we are met with an HTTP 500 Server Error page instead of the desired Jupyter UI.
Strange. We try to diagnose that by running !curl -i localhost:9000 from the Colab notebook itself, but we still get an error message:

The output of lsof from earlier gives us a clue: instead of listening on 0.0.0.0/:: (all IPs over all interfaces), Jupyter is only listening on the private IP given to the Colab instance. This is presumably in order to avoid exposing the Jupyter interface to us.
Google certainly didn’t try hard enough to hide it though, and there’s a quick fix.
In order to bypass the listening address restriction, we need to create a process that listens on all interfaces and IPs and forwards all the traffic it gets to the specific IP address that Jupyter is listening on. We can install the socket proxy tool socat (”Socket Cat”) to do so. We will use socat to forward traffic from localhost:9000 to $HOSTNAME:9000 and back:

This is a start! If we reload the URL in the browser, we see fragments of the Jupyter UI, but it's clearly broken.
This is because Jupyter expects to be accessed at the root of a domain (the URL path /), but our Colab tunnel has a path of /tun/m/<id>/_proxy/9000, messing up any absolute paths to resources such as CSS and JS files.
There's no easy solution here—we would need an entire (sub)domain to forward traffic to our Jupyter server.
Victory 3: Exposing Jupyter UI
Thankfully, Colab does have a well-hidden but official solution to port forwarding that does provide an entire subdomain! Funnily enough, it's so well-hidden that it took longer for me to find than it did to discover the internal reverse proxy!
To find out how to use Colab's official port forwarding, you need to open the Code Snippets tab from the left sidebar, and find the Output Handling snippet. Click "View Source Notebook," and you're taken to advanced_outputs.ipynb, Colab's garden of poweruser snippets showcasing scarecely-documented features of the platform. The specific snippet we need can be found under the heading "Browsing to servers executing on the kernel."
We can use this snippet to expose the Jupyter UI as a subdomain.
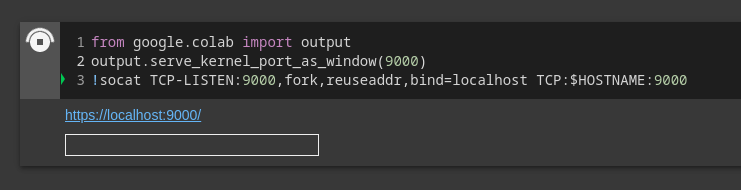
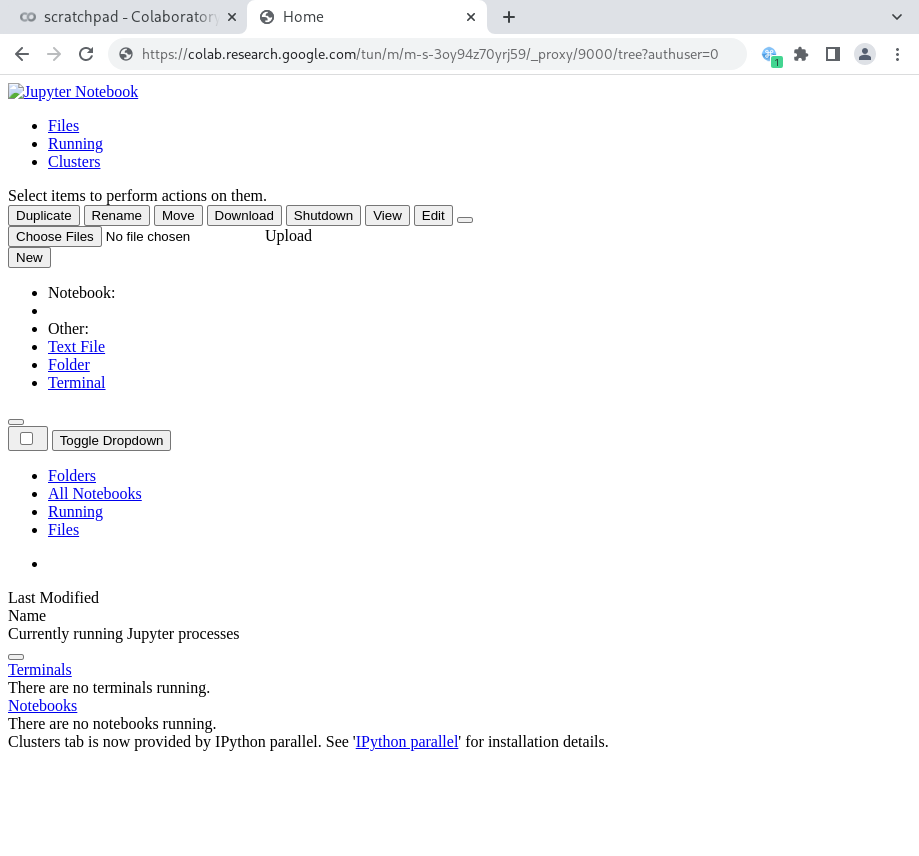
Now, we can click the link (and append /tree to the URL to appease Jupyter), and see the fully-working* Jupyter UI!
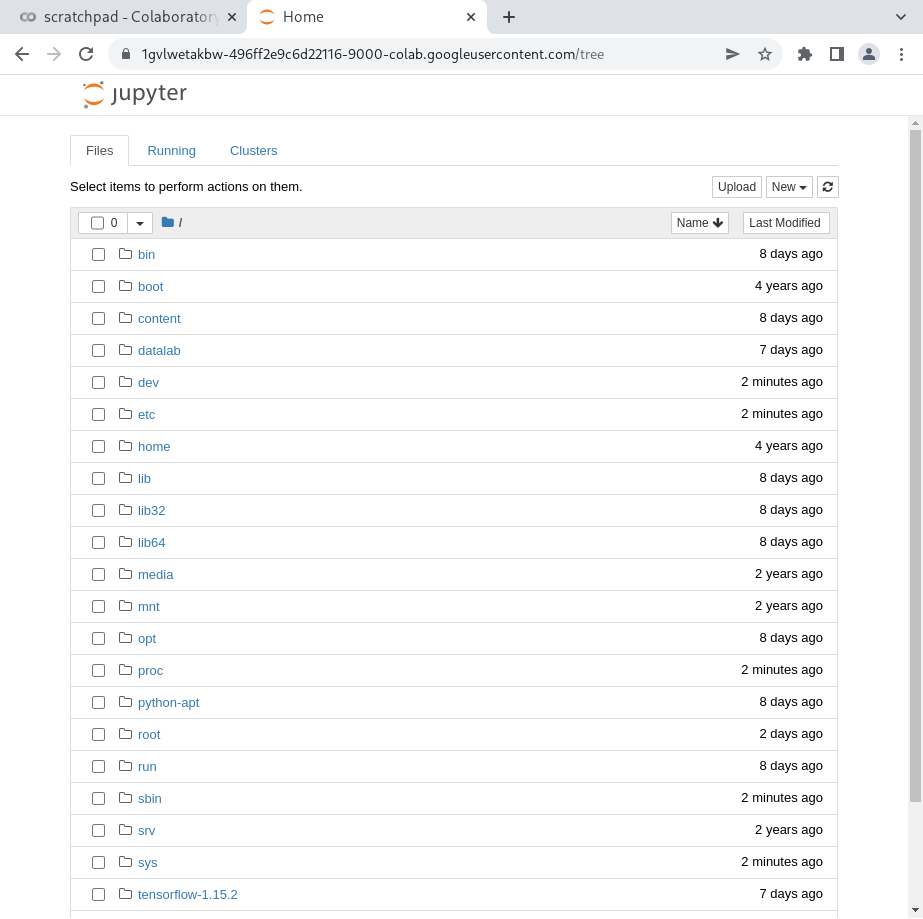
* Well, almost fully working. Google seems to have limited the official proxy to only GET requests, allowing us to view, but not run, notebooks.
Wrap-up
Congrats, you made it to the end! I hope this was valuable in showing you things you didn’t know about how Colab works, as well as learning a semi-structured approach to reverse-engineering tools in general. I also hope that this has inspired you to take a deeper look at the internals of the tools and products you use every day!
If you’re a data scientist looking to take your organization’s data and machine learning processes to the next level, check out DagsHub. Our collaborative platform allows you to develop reproducible data pipelines, track model experimentation, and collect training data, annotations, and trained models throughout the machine learning lifecycle.
DagsHub: where people build data science projects.


