Code to production-ready machine learning in 4 steps
- Dean Pleban
- 7 min read
- 5 years ago
Co-Founder & CEO of DAGsHub. Building the home for data science collaboration. Interested in machine learning, physics and philosophy. Join https://DAGsHub.com | DagsHub Co-Founder & CEO

How we turned a data science code repository into a data & model versioned, experiment tracked project, ready for production
TL;DR
We'll take a code-only machine learning project from GitHub, and show how you can add:
- Data & model versioning using DVC and DAGsHub
- Experiment tracking with human-readable formats using DAGsHub Logger
- A notebook that lets anyone experiment with the model
If you want to go straight to the results, check out the BioBERT DAGsHub repo.
Using machine learning projects you find online is hard, especially if you want to use them in production. In a big part, this is because you need to patch together all the information the project consists of. You usually start with some code on GitHub. You then must find the data that the model was trained and evaluated on, the parameters used, and results achieved by the model. This is usually done without a clear way to try out the model on your own examples, to make sure it works as expected.
Up until recently, solving these problems was a difficult task, requiring the creator to synchronize multiple platforms to have everything within reach. This is no longer the case. You can turn a project from only-code to a production-ready ML project, with:
- Data versioning
- Model versioning
- Experiment tracking
- Interactive inference – A notebook that loads the model and lets you experiment with it
All with open source tools. Perhaps counterintuitively, it’s really easy to do it. By the end of this post, I’ll show you how I transformed one such project, and got data browsing, diffing and sharing, experiment visualization, and even notebook diffing on the way.
A great project you’ll never be able to use
There are many data science projects on GitHub, but when you’re looking for something that you can use in your project or if you want to modify the results, it’s common not to find everything you need. After all, a complete data science project consists of code, but also data, models, experiments, and pipelines. Usually, you end up spending a lot of time patching together these components, and it becomes really painful to make things work. This means that data science projects are neglected, or even worse, re-implemented from scratch. We have better things to do with our time.
Having all these components exist in one place would make it much easier to share our data science projects with the required context, collaborate on them with others, and be more productive.
We would promote our project from its current state as an open-source code project, to an Open Source Data Science project.
Now, you might say: “Of course that’s what we want. The reason we don’t see it happening is that it’s super hard to pull off.” – Well with the tools of today, that is no longer the case.
Background for the project
We started this project as part of a collaborative effort, which on the ML side was focused on analyzing and extracting information from medical texts. The goal was to understand how clinical trials were performed.
Therefore, we were interested in language models for medical texts, and specifically NER. We scoured the internet and chose BioBERT as a good place to start from. The model had good results and seemed relatively easy to use.
When we found the GitHub BioBERT project, we had all the code, we had a script to download the data, which was done using wget from some google docs, and we had 4 folders, 3 of them for each task that the model can perform – NER (Named Entity Recognition), QA (Question Answering), and RE (Relation Extraction). There was also a folder for the embeddings themselves. Each folder contained the code to preprocess the data, and train the model for that task. The README in each folder included results.
Not a bad start, but we wanted more.
One thing which is harder to recreate (by definition), and we won’t focus on in this post, is the experiment history for the project. We’d like to see what experiments didn’t work out as much as we want to see the ones that did – imagine trying an approach and realizing, after the fact, that someone already tried it and it didn’t work, but it was never documented. The best way to have our experiment history is to start working with data & model versioning and experiment tracking from the start, ideally adding a meaningful commit message to describe your experiment approach.
Adding Data Versioning
The first step of the way was adding the data to be versioned as part of the project. Originally to get the data, you had to run a script that downloaded the datasets. One approach is to turn this into a DVC pipeline step, which would enable us to change the script and run this automatically. Since we wanted to do this in the simplest, most straightforward way, we just ran the script locally. After the data was downloaded to our system, we added the folder to be tracked by DVC.
After downloading the data, our datasets/ folder looks like this:
$ ./download.sh
$ tree datasets -d
datasets
├── NER
│   ├── BC2GM
│   ├── BC4CHEMD
│   ├── BC5CDR-chem
│   ├── BC5CDR-disease
│   ├── JNLPBA
│   ├── NCBI-disease
│   ├── linnaeus
│   └── s800
├── QA
│   └── BioASQ
└── RE
    ├── GAD
    │   ├── 1
    │   ├── 2
    │   ⋮
    │
    └── euadr
        ├── 1
        ├── 2
        ⋮

34 directories
We have a folder for each task the model performs (NER, QA, RE) with various datasets for each task. Each folder contains a few files (task-dependent), mostly a train set, dev set, and test set.
Instead of needing to track each file individually, with dvc, we can treat the entire folder as a dataset object, by typing in our terminal:
$ dvc add datasetsNext, we have our preprocessing step. The preprocessing steps we need for each of the 3 tasks are different. Since in this post, we’re focusing on the NER task, our preprocessing script is located in the named-entity-recognition/ folder. What this script does is convert the .tsv files into .txt files, and then run the preprocess.py script, which tokenizes the data and saves the data into a text file next to its label. This preprocessed data is saved to our preprocessed_datasets/ folder, in the appropriate task and dataset folder. In our case, that is NER/. After the preprocessing step is done, we can add the preprocessed data to be tracked by DVC, by typing in our terminal:
$ dvc add preprocessed_datasetsWhat happens when I change the data
Now let’s say you want to add the preprocessed data for the RE task. What we’d do is run the preprocessing step, and then instead of dvc add … we’ll do:
$ dvc commit preprocessed_datasetsFollowed by committing and pushing to Git and then DVC:
$ git add .
$ git commit -m “Updated preprocessed data with RE task”
$ git push origin master
$ dvc push -r origin
Training the Model and making it accessible
So preprocessing was a relatively “lightweight” step. In this specific case, we could do it in a reasonable amount of time on a not-too-powerful computer. When we get to training, that is not necessarily the case, and we want to bring out the big guns, if possible. Since we want this project to be community accessible, those big guns are Google Colab, which gives us a free GPU. We still want to pull the code and data from DAGsHub and push them back alongside the model after training.
In our case, we created this notebook that we committed to our project repository. It consists of the following sections:
- Load the code, data, and models using
git pullanddvc pullcommands - Fine-tune the model on the relevant BioMed dataset
- Load the model and see how it performs on some user-provided examples.
- Commit all code, data, and model changes back to our DAGsHub Git and DVC remotes.
In the last section, we commit our models using the same commands as we used for adding our data:
# If this is the first time adding the output folder
$ dvc add outputs

# If we changed our model
$ dvc commit outputs
Adding experiment tracking with ease
The last thing we wanted to add is experiment tracking. As I mentioned in the opening, it’s challenging to add this for the historical experiments, because these are lost if the project isn’t documenting experiments from day one. Since we want to make it easy to collaborate in the future, we thought it would be better to add it late than never.
To do this, we made some small modifications to the run script, so that it would auto-log all metrics during training, based on the 🤗 Transformers library which is used to fine-tune the model. You can see the changes here. This will generate some metrics.csv and params.yaml files which hold all the experiment’s context. We then pushed these files with our code to the DAGsHub repository.
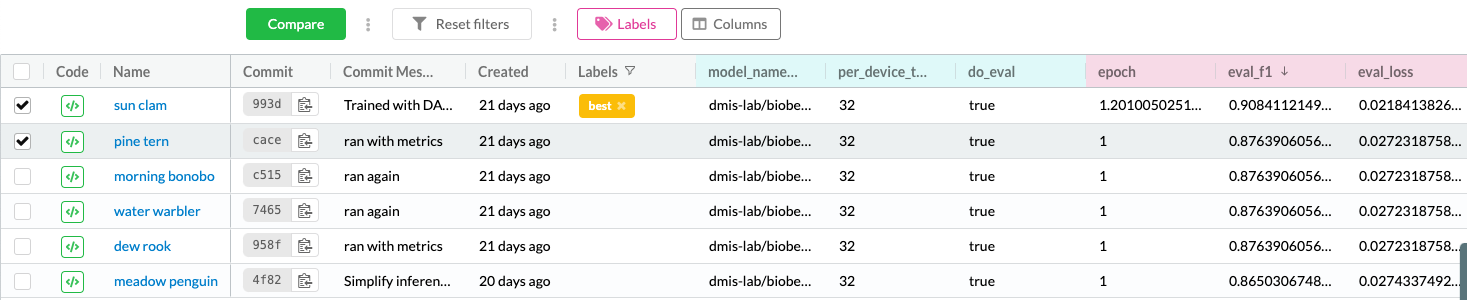
Now, when we run an experiment on some new data, or with different parameters, we’ll create an experiment that we can filter, share and compare. This also means that if someone wants to contribute to the project it would be much easier for them to understand what we tried, what is working, and what requires improvement.
Interactive Inference for the model
I already mentioned this above, but one of the things we added into our notebook is a “playground” section that lets anyone load our model, and try it out in the same place they can edit the model. Try it out for yourself here.

We believe that this is important for any data science project, but especially for the ones you want to share and collaborate on. Every serious OSS project has a demo, and every serious OSDS project should have one too. In ML, that might be more resource-heavy, so a demo notebook is the best middle ground. A notebook has the added benefit of letting users change aspects of the model or test out their own examples to see where the model might not work as well.
Another bonus: if you decide to make a change to the model and want to see a comparison of your results with the original model, you can commit your notebook to DAGsHub to use notebook diffing as part of our data science pull requests.

Summary
🥳 Congratulations! If you’ve made it here, you’ve successfully converted a data science code repo into a production-ready data science project – all with data and model version, experiment tracking, and even a neat way to train models on a GPU machine and demo the model for collaborators. If you have any questions, feel free to join our Discord channel. If you’re working on converting a project, let me know, I’d be happy to help.


