

Level 2 - Data Versioning
Level overview
Now that we have a project and the raw data, and have understood its structure well enough to train a basic model from it, the next step is to try different types of data processing and models to learn what works better.
In real life, this part is often where things get complicated, difficult to remember, track, and reproduce.
Our approach to handling this complexity is to save your generated models and data as part of your Git commits. Then you can quickly repeat the model training and evaluation process with slight modifications, while still being able to easily snapshot each experiment, so you can always reproduce them.
It also means that it's much easier to collaborate - your teammates can just see the different data and model versions you created, reproduce them and try to improve them.
Vanilla Git itself is sadly not built to handle large files. Therefore, this level of the tutorial shows how to use DVC to version your data and models in Git commits.
Too slow for you?
The full resulting project can be found here:
 See the project on DagsHub
Writing the basic training code
Let's use our existing insights and code from the data exploration level to get started with a single Python script which:
- Loads the data
- Processes the data
- Trains a classification model
- Evaluates the trained model and reports relevant metrics.
We'll put all this in a single script called main.py for now.
You can download the complete file here: main.py
and save it to your project folder.
Tip
Alternatively, you can create a file called main.py and copy the following into it:
import pandas as pd
from sklearn.feature_extraction.text import TfidfVectorizer
from sklearn.linear_model import LogisticRegression
from sklearn.metrics import roc_auc_score, average_precision_score, accuracy_score, precision_score, recall_score, \
    f1_score
from sklearn.model_selection import train_test_split


def feature_engineering(raw_df):
    df = raw_df.copy()
    df['CreationDate'] = pd.to_datetime(df['CreationDate'])
    df['CreationDate_Epoch'] = df['CreationDate'].astype('int64') // 10 ** 9
    df['MachineLearning'] = df['Tags'].str.contains('machine-learning').fillna(False)
    df = df.drop(columns=['Id', 'Tags'])
    df['Title_Len'] = df.Title.str.len()
    df['Body_Len'] = df.Body.str.len()
    # Drop the correlated features
    df = df.drop(columns=['FavoriteCount'])
    df['Text'] = df['Title'].fillna('') + ' ' + df['Body'].fillna('')
    return df


def fit_tfidf(train_df, test_df):
    tfidf = TfidfVectorizer(max_features=25000)
    tfidf.fit(train_df['Text'])
    train_tfidf = tfidf.transform(train_df['Text'])
    test_tfidf = tfidf.transform(test_df['Text'])
    return train_tfidf, test_tfidf, tfidf


def fit_model(train_X, train_y):
    clf_tfidf = LogisticRegression(solver='sag')
    clf_tfidf.fit(train_X, train_y)
    return clf_tfidf


def eval_model(clf, X, y):
    y_proba = clf.predict_proba(X)[:, 1]
    y_pred = clf.predict(X)
    return {
        'roc_auc': roc_auc_score(y, y_proba),
        'average_precision': average_precision_score(y, y_proba),
        'accuracy': accuracy_score(y, y_pred),
        'precision': precision_score(y, y_pred),
        'recall': recall_score(y, y_pred),
        'f1': f1_score(y, y_pred),
    }


if __name__ == '__main__':
    print('Loading data...')
    df = pd.read_csv('data/CrossValidated-Questions.csv')
    train_df, test_df = train_test_split(df)
    del df

    train_df = feature_engineering(train_df)
    test_df = feature_engineering(test_df)

    print('Fitting TFIDF...')
    train_tfidf, test_tfidf, tfidf = fit_tfidf(train_df, test_df)

    print('Fitting classifier...')
    train_y = train_df['MachineLearning']
    model = fit_model(train_tfidf, train_y)

    train_metrics = eval_model(model, train_tfidf, train_y)
    print('Train metrics:')
    print(train_metrics)

    test_metrics = eval_model(model, test_tfidf, test_df['MachineLearning'])
    print('Test metrics:')
    print(test_metrics)
Running the training script for the first time
We can see that the script works by running:
python3 main.py
The output should look more or less like this:
Loading data...
Fitting TFIDF...
Fitting classifier...
Train metrics:
{'roc_auc': 0.9264913034812006, 'average_precision': 0.5975913323426428, 'accuracy': 0.90584, 'precision': 0.7115251897860594, 'recall': 0.24879343629343628, 'f1': 0.3686751296263186}
Test metrics:
{'roc_auc': 0.877444815878766, 'average_precision': 0.4621588861511042, 'accuracy': 0.89408, 'precision': 0.5871369294605809, 'recall': 0.20099431818181818, 'f1': 0.29947089947089944}
If you encounter a No module named 'pandas' error
If you encounter an error which looks like this:
Traceback (most recent call last):
  File "main.py", line 1, in <module>
    import pandas as pd
ModuleNotFoundError: No module named 'pandas'
That probably means you forgot to activate your virtual environment:
source .venv/bin/activate
.venv\Scripts\activate.bat
We can see that we get decent performance considering the problem and how basic our model is, and that it's consistent with what we got during data exploration.
It's a good idea to commit this to Git so we can always get back to a working version:
git add main.py
git commit -m "Basic training script"
Now, we want to see how we can improve on this baseline performance.
Things to improve in the script
That script was nice just to see that everything works, but before we start experimenting, there are some issues we should fix:
- Right now, the test set will be different every time we run the script.
If we want to compare different runs, we need to make sure the test set stays the same across different runs or risk introducing noise and uncertainty into our decision making.
To fix this, we should do the train-test split as a separate step which we run only once, and train the model in a different step which we will run several times, with different configurations, using the same test set. - It's also a good idea to stratify our train-test split
by the
MachineLearningclass, since our classes are imbalanced. - We didn't set random seeds - to get reproducible research and leave as little to chance as possible, this is also an important practice.
- We should save our trained model as a file - otherwise, how will we use it in real life?
Simple things first - let's create a directory to save our outputs:
mkdir -p outputs
echo /outputs/ >> .gitignore
Note that our outputs are also in .gitignore - you usually won't want to save these using Git,
especially if dealing with large models like neural networks.
In our case, the TFIDF object is fairly large.
Now, we'll mostly change our main function so that it supports running one of the two steps (train-test split and training),
as well as a few other code changes to address all the points above.
You can download the complete file here: main.py
Tip
Alternatively, you can copy the updated main.py contents here:
import argparse
import pandas as pd
from sklearn.feature_extraction.text import TfidfVectorizer
from sklearn.linear_model import LogisticRegression
from sklearn.metrics import roc_auc_score, average_precision_score, accuracy_score, precision_score, recall_score, \
    f1_score
from sklearn.model_selection import train_test_split
import joblib

# Consts
CLASS_LABEL = 'MachineLearning'
train_df_path = 'data/train.csv.zip'
test_df_path = 'data/test.csv.zip'


def feature_engineering(raw_df):
    df = raw_df.copy()
    df['CreationDate'] = pd.to_datetime(df['CreationDate'])
    df['CreationDate_Epoch'] = df['CreationDate'].astype('int64') // 10 ** 9
    df = df.drop(columns=['Id', 'Tags'])
    df['Title_Len'] = df.Title.str.len()
    df['Body_Len'] = df.Body.str.len()
    # Drop the correlated features
    df = df.drop(columns=['FavoriteCount'])
    df['Text'] = df['Title'].fillna('') + ' ' + df['Body'].fillna('')
    return df


def fit_tfidf(train_df, test_df):
    tfidf = TfidfVectorizer(max_features=25000)
    tfidf.fit(train_df['Text'])
    train_tfidf = tfidf.transform(train_df['Text'])
    test_tfidf = tfidf.transform(test_df['Text'])
    return train_tfidf, test_tfidf, tfidf


def fit_model(train_X, train_y, random_state=42):
    clf_tfidf = LogisticRegression(solver='sag', random_state=random_state)
    clf_tfidf.fit(train_X, train_y)
    return clf_tfidf


def eval_model(clf, X, y):
    y_proba = clf.predict_proba(X)[:, 1]
    y_pred = clf.predict(X)
    return {
        'roc_auc': roc_auc_score(y, y_proba),
        'average_precision': average_precision_score(y, y_proba),
        'accuracy': accuracy_score(y, y_pred),
        'precision': precision_score(y, y_pred),
        'recall': recall_score(y, y_pred),
        'f1': f1_score(y, y_pred),
    }


def split(random_state=42):
    print('Loading data...')
    df = pd.read_csv('data/CrossValidated-Questions.csv')
    df[CLASS_LABEL] = df['Tags'].str.contains('machine-learning').fillna(False)
    train_df, test_df = train_test_split(df, random_state=random_state, stratify=df[CLASS_LABEL])

    print('Saving split data...')
    train_df.to_csv(train_df_path)
    test_df.to_csv(test_df_path)


def train():
    print('Loading data...')
    train_df = pd.read_csv(train_df_path)
    test_df = pd.read_csv(test_df_path)

    print('Engineering features...')
    train_df = feature_engineering(train_df)
    test_df = feature_engineering(test_df)

    print('Fitting TFIDF...')
    train_tfidf, test_tfidf, tfidf = fit_tfidf(train_df, test_df)

    print('Saving TFIDF object...')
    joblib.dump(tfidf, 'outputs/tfidf.joblib')

    print('Training model...')
    train_y = train_df[CLASS_LABEL]
    model = fit_model(train_tfidf, train_y)

    print('Saving trained model...')
    joblib.dump(model, 'outputs/model.joblib')

    print('Evaluating model...')
    train_metrics = eval_model(model, train_tfidf, train_y)
    print('Train metrics:')
    print(train_metrics)

    test_metrics = eval_model(model, test_tfidf, test_df[CLASS_LABEL])
    print('Test metrics:')
    print(test_metrics)


if __name__ == '__main__':
    parser = argparse.ArgumentParser()
    subparsers = parser.add_subparsers(title='Split or Train step:', dest='step')
    subparsers.required = True
    split_parser = subparsers.add_parser('split')
    split_parser.set_defaults(func=split)
    train_parser = subparsers.add_parser('train')
    train_parser.set_defaults(func=train)
    parser.parse_args().func()
Now we've updated the script, lets run both it's stages:
Train-test split step:
python3 main.py split
Here the output is:
Loading data...
Saving split data...
Training step:
python3 main.py train
Here the output is:
Loading data...
Engineering features...
Fitting TFIDF...
Saving TFIDF object...
Training model...
Saving trained model...
Evaluating model...
Train metrics:
{'roc_auc': 0.9254119108511665, 'average_precision': 0.5958732255869963, 'accuracy': 0.90528, 'precision': 0.7059219380888291, 'recall': 0.25192122958693564, 'f1': 0.37132743362831855}
Test metrics:
{'roc_auc': 0.8808051840002658, 'average_precision': 0.46366929635715587, 'accuracy': 0.89472, 'precision': 0.5756302521008403, 'recall': 0.19740634005763688, 'f1': 0.2939914163090129}
And let's commit these changes to Git:
$ git status -s
M .gitignore
M main.py
git add .gitignore main.py
git commit -m "Training script with outputs"
Installing DVC
Installing DVC is as simple as To start, we need to initialize our git repo to also use DVC for data versioning:
dvc init
Warning
This tutorial was last updated to DVC version 1.10.1. If you are using an older version, please update. If you are using a newer version, be aware the behavior of some commands may change.
The following directory structure should be created:
.dvc
├── .gitignore
├── config
├── plots
│   ├── confusion.json
│   ├── default.json
│   ├── scatter.json
│   └── smooth.json
└── tmp
This is somewhat similar to the .git folder contained in every git repo, except some of its contents will be tracked using git.
.dvc/configis similar to.git/config. By default, it's empty. More on this later on..dvc/.gitignoremakes sure git ignores DVC internal files that shouldn't be tracked by Git..dvc/plotscontains predefined templates for plots you can generate usingdvc- more info here..dvc/tmpis used by DVC to store temporary files, this shouldn't interest the average user..dvc/cachedoesn't exist yet, but it is where DVC will keep the different versions of our data files. It's very similar in principle to.git/objects.
Some of the files generated by dvc init should be tracked by Git, so let's start by committing that:
git add .dvc
git commit -m "dvc init"
Instructing DVC to track data and outputs
Now that we have DVC installed, telling it to keep track of our data and outputs is simple with dvc add:
dvc add data
dvc add outputs
You should see two new metadata files, created by DVC:
$ git status -s
?? data.dvc
?? outputs.dvc

$ cat data.dvc
outs:
- md5: 714b1181c5d7cb9dda66272be8be33ac.dir
  path: data

$ cat outputs.dvc
outs:
- md5: bc939fd1899e52dd1a5c65be0443986a.dir
  path: outputs
What am I seeing here?
Don't panic! These two YAML files are just DVC's way to keep track of the data file versions.
The md5 is a hash of the file contents (in this case, directory contents).
The files themselves live inside .dvc/cache:
$ cat .dvc/cache/bc/939fd1899e52dd1a5c65be0443986a.dir
[{"md5": "e0eb0e51fe66093d9c3c714f74c530f8", "relpath": "model.joblib"}, {"md5": "af5bba3566fe64976cbfabe237eda756", "relpath": "tfidf.joblib"}]
The .dvc files are committed to Git, while the actual data files are ignored by Git.
In our case, we added the data and outputs directories to .gitignore manually, but if we hadn't,
then DVC would add them to .gitignore automatically after we run dvc add.
Now, we can commit these .dvc files to Git:
git add data.dvc outputs.dvc
git commit -m "Added data and outputs to DVC"
From now on, this version of the data and models will be tied to this Git commit, and we'll be able to reproduce them easily later on.
Another training run
Now, let's try re-running the training with a different configuration.
We'll try to use a SGDClassifier with loss='modified_huber'
(since this type of loss supports all of the metric types we calculate).
You can download the complete file here: main.py
Tip
Alternatively, you can copy the updated main.py contents here:
import argparse
import pandas as pd
from sklearn.feature_extraction.text import TfidfVectorizer
from sklearn.linear_model import SGDClassifier
from sklearn.metrics import roc_auc_score, average_precision_score, accuracy_score, precision_score, recall_score, \
    f1_score
from sklearn.model_selection import train_test_split
import joblib

# Consts
CLASS_LABEL = 'MachineLearning'
train_df_path = 'data/train.csv.zip'
test_df_path = 'data/test.csv.zip'


def feature_engineering(raw_df):
    df = raw_df.copy()
    df['CreationDate'] = pd.to_datetime(df['CreationDate'])
    df['CreationDate_Epoch'] = df['CreationDate'].astype('int64') // 10 ** 9
    df = df.drop(columns=['Id', 'Tags'])
    df['Title_Len'] = df.Title.str.len()
    df['Body_Len'] = df.Body.str.len()
    # Drop the correlated features
    df = df.drop(columns=['FavoriteCount'])
    df['Text'] = df['Title'].fillna('') + ' ' + df['Body'].fillna('')
    return df


def fit_tfidf(train_df, test_df):
    tfidf = TfidfVectorizer(max_features=25000)
    tfidf.fit(train_df['Text'])
    train_tfidf = tfidf.transform(train_df['Text'])
    test_tfidf = tfidf.transform(test_df['Text'])
    return train_tfidf, test_tfidf, tfidf


def fit_model(train_X, train_y, random_state=42):
    clf_tfidf = SGDClassifier(loss='modified_huber', random_state=random_state)
    clf_tfidf.fit(train_X, train_y)
    return clf_tfidf


def eval_model(clf, X, y):
    y_proba = clf.predict_proba(X)[:, 1]
    y_pred = clf.predict(X)
    return {
        'roc_auc': roc_auc_score(y, y_proba),
        'average_precision': average_precision_score(y, y_proba),
        'accuracy': accuracy_score(y, y_pred),
        'precision': precision_score(y, y_pred),
        'recall': recall_score(y, y_pred),
        'f1': f1_score(y, y_pred),
    }


def split(random_state=42):
    print('Loading data...')
    df = pd.read_csv('data/CrossValidated-Questions.csv')
    df[CLASS_LABEL] = df['Tags'].str.contains('machine-learning').fillna(False)
    train_df, test_df = train_test_split(df, random_state=random_state, stratify=df[CLASS_LABEL])

    print('Saving split data...')
    train_df.to_csv(train_df_path)
    test_df.to_csv(test_df_path)


def train():
    print('Loading data...')
    train_df = pd.read_csv(train_df_path)
    test_df = pd.read_csv(test_df_path)

    print('Engineering features...')
    train_df = feature_engineering(train_df)
    test_df = feature_engineering(test_df)

    print('Fitting TFIDF...')
    train_tfidf, test_tfidf, tfidf = fit_tfidf(train_df, test_df)

    print('Saving TFIDF object...')
    joblib.dump(tfidf, 'outputs/tfidf.joblib')

    print('Training model...')
    train_y = train_df[CLASS_LABEL]
    model = fit_model(train_tfidf, train_y)

    print('Saving trained model...')
    joblib.dump(model, 'outputs/model.joblib')

    print('Evaluating model...')
    train_metrics = eval_model(model, train_tfidf, train_y)
    print('Train metrics:')
    print(train_metrics)

    test_metrics = eval_model(model, test_tfidf, test_df[CLASS_LABEL])
    print('Test metrics:')
    print(test_metrics)


if __name__ == '__main__':
    parser = argparse.ArgumentParser()
    subparsers = parser.add_subparsers(title='Split or Train step:', dest='step')
    subparsers.required = True
    split_parser = subparsers.add_parser('split')
    split_parser.set_defaults(func=split)
    train_parser = subparsers.add_parser('train')
    train_parser.set_defaults(func=train)
    parser.parse_args().func()
Now run python3 main.py train to get:
...
Train metrics:
{'roc_auc': 0.9546657196819067, 'average_precision': 0.7174193549553161, 'accuracy': 0.9192533333333334, 'precision': 0.794300518134715, 'recall': 0.3681556195965418, 'f1': 0.5031178208073515}
Test metrics:
{'roc_auc': 0.8611241864339614, 'average_precision': 0.45830796380276095, 'accuracy': 0.89608, 'precision': 0.5779334500875657, 'recall': 0.2377521613832853, 'f1': 0.33690658499234305}
That's significantly better than our previous results!
Now, we have a new version of a trained model in outputs/model.joblib.
We can see that by running dvc status:
$ dvc status
outputs.dvc:
    changed outs:
        modified:           outputs
To record the md5 of the new model, and save it to .dvc/cache, we can run:
dvc commit -f
This updates the outputs.dvc file with the hash of the new output files, as well as store the new model version in .dvc/cache:
$ git diff outputs.dvc
diff --git a/outputs.dvc b/outputs.dvc
index f46cc7b..a4380e0 100644
--- a/outputs.dvc
+++ b/outputs.dvc
@@ -1,3 +1,5 @@
 outs:
-- md5: bc939fd1899e52dd1a5c65be0443986a.dir
+- md5: bec98fed20b7963f504d37b80eb385a2.dir
   path: outputs
+  size: 3182831
+  nfiles: 2

$ cat .dvc/cache/be/c98fed20b7963f504d37b80eb385a2.dir
[{"md5": "277b6483258a885a51539cd2a0e0019d", "relpath": "model.joblib"}, {"md5": "5c0727f5e787991a7d7dd1e3b6f5565f", "relpath": "tfidf.joblib"}]
Finally, we commit everything to git:
git add main.py outputs.dvc
git commit -m "Tried SGDClassifier with modified_huber loss"
Reproducing an old experiment
Now, after we run a few experiments and want to reproduce one which looked promising, we
can just do that with a git checkout followed by a dvc checkout.
For example, to return to our previous commit, we can do:
git checkout HEAD~
dvc checkout
And we will then have the older version of the model at outputs/model.joblib.
Automate DVC checkout after each Git commit
If you want DVC to automatically checkout after each Git commit, you can do that with dvc install.
Pushing code, data, and models to DagsHub
It's great to have saved versions of our data and models in our local workspace, but what if we have team members? Or if we want to continue work on some other machine?
DagsHub has you covered - not only can you push your Git code history to DagsHub, but you can also push (and later pull) all DVC managed files!
First of all, make sure you return to the latest version of the master branch:
git checkout master
dvc checkout
Now, we need to define DagsHub as our DVC remote.
If you don't know what your DagsHub password is (for instance, if you signed up via Github), then first create an access token and use that token instead of a password.
Now, copy the following commands into your terminal:
echo -n "Username: "
read DAGSHUB_USER
echo -n "Repo name: "
read DAGSHUB_REPO
echo -n "Token: "
read -s DAGSHUB_TOKEN
dvc remote add origin s3://dvc
dvc remote modify origin  endpointurl https://dagshub.com/$DAGSHUB_USER/$DAGSHUB_REPO.s3
dvc remote modify origin --local access_key_id $DAGSHUB_TOKEN
dvc remote modify origin --local secret_access_key $DAGSHUB_TOKEN
unset DAGSHUB_TOKEN
set /p DAGSHUB_USER="Username: "
set /p DAGSHUB_REPO="Repo name: "
set /p DAGSHUB_TOKEN="Token: "
dvc remote add origin s3://dvc
dvc remote modify origin  endpointurl https://dagshub.com/%DAGSHUB_USER%/%DAGSHUB_REPO%.s3
dvc remote modify origin --local access_key_id %DAGSHUB_TOKEN%
dvc remote modify origin --local secret_access_key %DAGSHUB_TOKEN%
set DAGSHUB_TOKEN=
You can see that some DVC stores some configurations in .dvc/config, which should be committed to Git:
$ git diff
diff --git a/.dvc/config b/.dvc/config
index e69de29..6a6ea49 100644
--- a/.dvc/config
+++ b/.dvc/config
@@ -0,0 +1,2 @@
+['remote "origin"']
+    url = https://dagshub.com/DagsHub-Official/DagsHub-Tutorial.dvc
Why use --local in the DVC remote commands?
Only configurations that are shared across collaborators should be stored in .dvc/config.
The other configuration file is .dvc/config.local - it functions identically to .dvc/config, except it's
ignored by Git. That's the correct way to store things like usernames and passwords.
We used the --local flag to indicate to DVC that these configuration keys should only be stored locally.
Make sure not to accidentally commit secret information to .dvc/config!
So, let's commit these configuration changes to git:
git add .dvc/config
git commit -m "Configured the DVC remote"
And push to our repo:
git push -u origin master
dvc remote default origin
dvc push --all-commits
Now, any future collaborator can git clone and then dvc pull the data and models from any version.
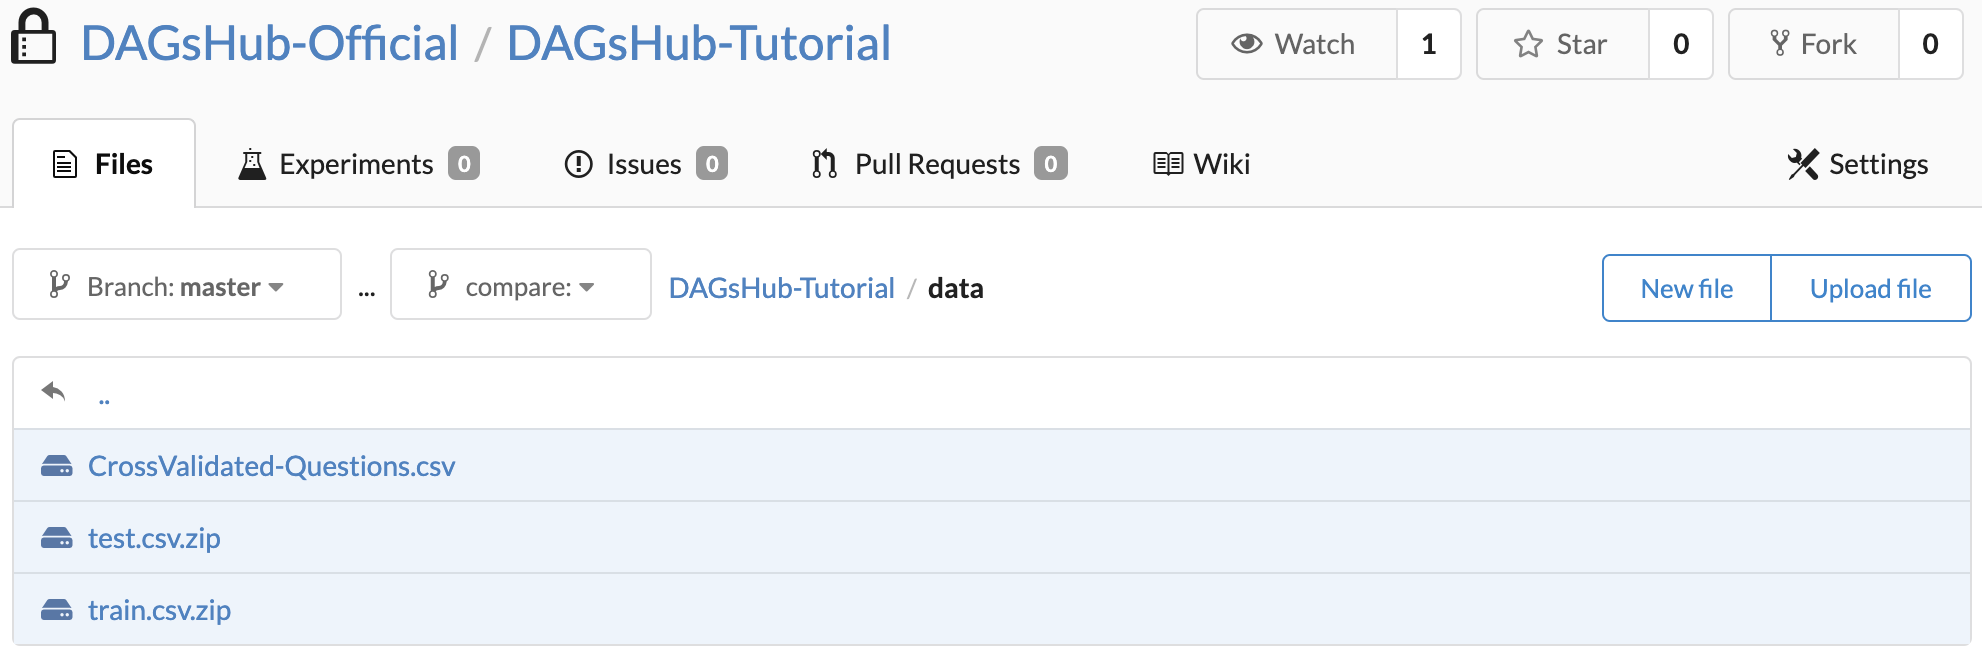
What's more, you and your collaborators can now explore and download the code and model files directly from the DagsHub UI!
Next Steps
In the next level, we'll see how to log information about our experiments as part of our Git commits, so we can better visualize and compare them.